 Reading Time: 4 minutes
In boot camp lesson one, we focused on embracing our chef sense and breaking free of recipes. Now, we get to wield a big knife and show food who’s boss!
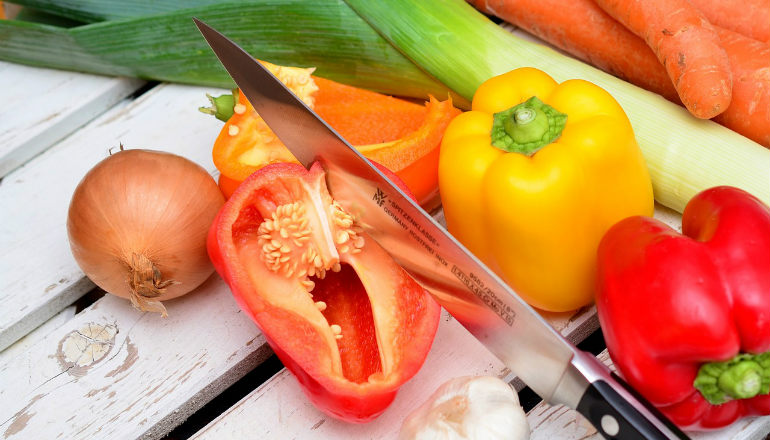
There is only one knife you truly need and it’s called the chef’s knife.
The chef’s knife is big and bold, and a lot of people shy away from it because it looks intimidating. For you, that ends today. Your chef’s knife is your number-one tool in the kitchen, and we are going to get a grip on it starting right now.
Choose Your Weapon
A chef’s knife is eight to ten inches long. The blade extends downward from the handle so you can chop things up without banging your fingers.
You probably already have a chef’s knife, since they come with every knife set. But if you don’t, remedy that situation pronto. You can usually get one at the grocery store for under twenty dollars. Your chef’s knife does not need to be expensive to get the job done. It’s a piece of steel sharpened into a blade and will defeat tomatoes every time.
You want your chef’s knife to feel good and balanced in your hand. If you pick it up and it makes you want to yell, “Yeah, I’m about to chop some stuff up!” — that’s your chef’s knife.
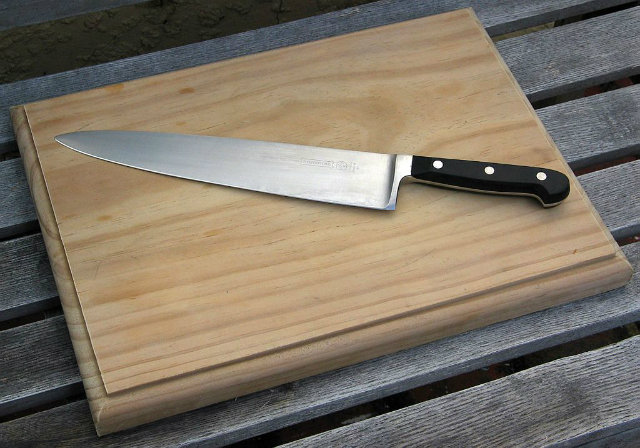
A Special Note About Cutting Boards:
Meat eaters need two cutting boards: a wood one for produce (pictured above) and a non-porous plastic or stone cutting board for meat.

Your Knife Work
There are two — and only two — knife skills you need to know for everyday food prep: chopping and mincing. If you want to do your fancy cuts, like chiffonade or julienne, do that on your own time. Here we are talking about getting things done.
- Chopping is for main ingredients. Think bite-size pieces.
- Mincing is for seasonings. Think sprinkly bits.
How to Chop:
1. Hold your chef’s knife with a good firm grip. I like to choke up on it and pinch the blade with my thumb and forefinger.
2. Put the tip down. Push through. Pull back. Repeat. That’s your chopping motion.
3. Your other hand forms a claw to hold the item down. Press your fingertips down on the item so that your fingers bend just enough to form a straight line between your middle and first knuckles. This is your knife guard.
4. Keep your thumb behind the fingertips always. Never like this:
5. Bringing the two motions together, hold the item with your claw while you slice through with your chopping motion.
You want to cut your pieces to be roughly the same thickness. This will help them cook uniformly. The thickness is up to you, but the width of your finger is a good guide for a bite-size piece. The thinner things are cut, the faster they cook.
How to Mince:
- Tip down.
- The other hand goes safely on top.
- Rock it up and down through the item.
- Work it back and forth in a semi-circle.
- Keep going until the item is nice and sprinkly.
Skill Drill: Applying the 5 Moves to Stir Fry
Let’s put your knife skills into action by making a flavorful and filling stir fry.
Ingredients:
- 2 serving vegetables — peppers, tomato, zucchini, broccoli, etc.
- 1 serving meat or meat substitute — tofu, steak, chicken breast, etc.
Note: See lesson one for guidance on serving sizes.
Seasonings:
- Salt
- Pepper
- Fat of choice — olive oil, butter, coconut oil, ghee, etc.
- Onion
- Garlic (ideally pre-peeled)
- 1 thing sour — lemon, lime, balsamic vinegar, rice vinegar, etc.
- 1 thing spicy — cayenne, chili, ginger, etc.
- 1 thing savory — dried or fresh oregano, basil, thyme, rosemary, etc.
Instructions:
- Cut all main ingredients into bite-size pieces. Remember to use your non-porous cutting board for meat.
- Place chopped ingredients in a frying pan big enough to hold them all comfortably. (Why dirty a bowl when you can season right in the pan?)
- Mince 3-5 garlic cloves (cloves are the little pieces; the bulb is the whole thing) and half an onion.
- Add all your seasoning to your main ingredients.
- Put the frying pan on the stove-top, and turn the heat to high. Stir regularly until done.
- Eat the results and check your work in the previous four moves.
Note: For a review on seasonings, checking doneness, and all the five moves, refer back to lesson one.
Run this drill a few times this week to practice your knife skills. Try new ingredients and seasonings each time.
Ready for more? Dive into the rest of the lessons in this series:
- The 5 Moves to Cooking Everything: Home Cooking Boot Camp Lesson 1
- The 3 Essential Cooking Methods: Home Cooking Boot Camp Lesson 3
- How to Make Multiple Meals at Once: Home Cooking Boot Camp Lesson 4
- How to Organize Your Kitchen for Speed: Home Cooking Boot Camp Lesson 5
- The Power of Flavor Profiles: Home Cooking Boot Camp Lesson 6
- The Secret Tool of Taste Balancing: Home Cooking Boot Camp Lesson 7
- Learn to Play the 3 Flavor Notes: Home Cooking Boot Camp Lesson 8
Chef’s knife photo by Donovan Govan. [GFDL or CC-BY-SA-3.0], via Wikimedia Commons.


If you interested in making healthy, delicious, home-cooked meals in a practical and consistent way, Casey is offering a free five-day email course called Jumpstart Your Healthy No-Recipe Meal Prep Practice.