 Reading Time: 7 minutes
After learning how to cook, creating a weekly meal prep routine is arguably the best thing you can do for your eating habits. In today’s busy life, we often wait until we are hungry to decide what to eat, which doesn’t always lead to the best outcome. Having meals prepared ahead of time lets you lock in choices that are perfect for you.
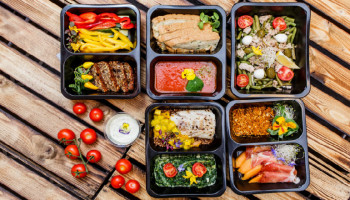
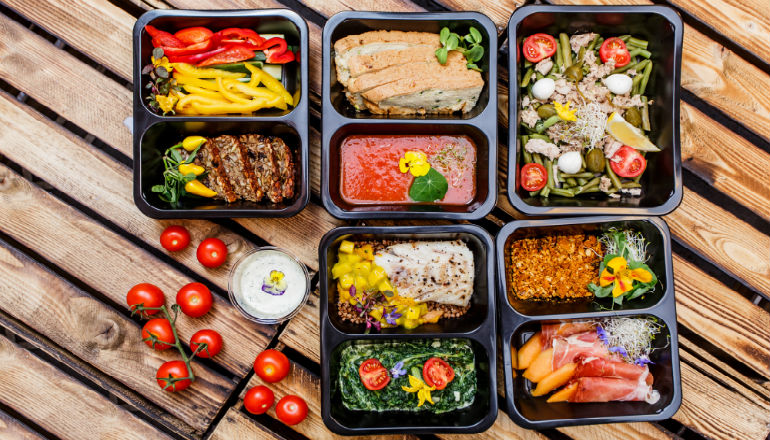
We’re going to start by preparing three meals in one go. If you practice these skills, you’ll work your way up to building all your lunches and/or all your dinners for the week. Or maybe all the lunches for all the members of your household — imagine the power and freedom in that!
Note: We will be building on our skills from previous lessons, so if you haven’t done those lessons or need a review before diving into your weekly meal prep, then click here.
The Magic: Make Multiple Meals at Once
In doing this drill, you will discover the efficiency of making multiple meals at once is off the charts. Consider that making any one meal typically takes thirty minutes from the time you walk into the kitchen to when you have finished cooking and cleaning up. And that’s on a good day.
But making three meals at once takes only about forty minutes. That means you tack on only five minutes of cooking time per additional meal and save yourself time at other points in your day or week.
When you make multiple meals at once, it puts the power of the assembly line at work for you. For instance, once you have your knife, cutting board, and receiving bowls ready for one meal, you just need to perform a few extra knife cuts to prep ingredients for additional meals. And that’s just chopping. Add up the efficiency for all five moves that go into cooking a meal, and you start to see how you can easily save time.
But theory only gets you so far. Practice is what makes an impact. So let’s jump right in. This might be a radically new experience for you, especially if you are just learning how to cook, but just follow the five moves like you did in each of the past lessons, and everything will turn out fine.
Skill Drill: Make 3 Meals at Once

Your Tools:
- 1 knife
- 1 cutting board for produce
- 1 cutting board for meat (should be plastic/non-porous)
- 3 bowls
- 6 containers for produce (Tupperware, bowls, tin foil)
- 3 (or 6) containers for meats or meat substitutes (bowls, tin foil)
You may need to pull out all your pots and pans for this, as well. We will get into kitchen tools and organization in the next lesson. Get by with what you have for now.
Ingredients:
- 2.5 servings of firm vegetables — carrots, cauliflower, yams, etc.
- 2.5 servings of soft vegetables — tomato, mushrooms, peppers, etc.
- 1 serving of leafy green — lettuce, kale, spinach, etc.
- 3 servings of meat or meat substitute
Note: You can change the allotment of vegetables if you’d like. You can do three servings of firm vegetables and two servings of soft or vice-versa, or do six servings of firm and no servings of soft. Chef’s choice! For guidance on what constitutes a “serving size,” see lesson one.
Seasonings:
- Salt
- Pepper
- Fat of choice — olive oil, butter, coconut oil, ghee, etc.
- Onion
- Garlic
- 3 things sour — lemon, lime, balsamic vinegar, rice vinegar, etc.
- 3 things spicy — cayenne, chili, ginger, etc.
- 3 things savory — dried or fresh oregano, basil, thyme, rosemary, etc.
Note: Your “3 things” seasonings don’t need to be three different options, but the more variety the better. For instance your three sour things could be lemon juice three times, but it would be more fun to use lemon once, lime once, and balsamic vinegar once.
Before getting out your knife, you need to do a little meal planning so you can determine how to chop your ingredients. Here’s what you do:
- Place the whole raw ingredients into containers. Divide six servings of produce into the six produce containers, and divide your three servings of meat or meat substitutes into their three containers. Don’t worry about putting raw meat in these three containers — you will either wash them later, or if you started with six containers for meat, you’ll put the cooked meat into the clean containers.
- Next, group the containers together as meals, however you see fit. Just be certain each meal gets two servings of produce and one serving of meat. You can break servings of produce in half and mix and match to make things interesting.
Grouping the ingredients into meals should give you ideas about how you want to cook and plate them up. For instance, you might see a salad emerging, a stir-fry opportunity, and a meal you just want to throw in the oven and roast. This should dictate how you want to chop things up, knowing what you know from the previous lessons.
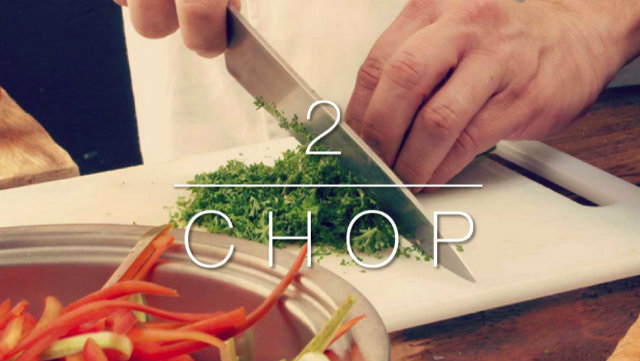
Now, work in this order:
- Chop your six servings of produce.
- Chop and/or mince your seasonings.
- Mince one serving of leafy greens for salad.
- Change cutting boards.
- Chop your proteins.
As you put the chopped items back into their containers, keep the containers grouped as meals. This will help you decide how you want to season them.

Set your oven to 400 degrees so it will be ready by the time you are done with the Sprinkle move.
Set a pot of water to boil if you plan on boiling anything. If you plan on boiling anything, you don’t need to season it first. You will save this step for after you finish cooking these items.
Season your ingredients one meal at a time. Put all the ingredients for one meal in front of you and decide how you want to season them in light of each other. You can combine the ingredients together for a quick stir-fry, or you can keep them separated to cook in different ways.
Note: Here’s the equation to create a simple vinaigrette or citrus dressing. 3 parts oil to 1 part sour (vinegar or citrus juice) + salt + pepper. Whisk vigorously with a fork.
Now you need to separate the ingredients from their meal groupings so you can cook them however you like. If you think you might forget what goes with what, snap a picture of the meal groupings.
Now, refresh yourself on the three cooking methods. Then:
- Decide first what goes in the oven and get those going.
- Put anything in the pot that needs to get boiled.
- As your oven and boiling items cook, concentrate on your saute work.
If you are comfortable sauteing, use multiple pans at once to cook down as many ingredients as you can at the same time. If not, then saute your ingredients one at a time. Rinse and repeat with the same pan or pans to minimize clean up.
As the cooked ingredients come off the heat, put the cooked produce back in their containers. Do not put the cooked meat back into their containers as these have been contaminated with raw meat juices. Either wash your containers or pull out clean ones for the cooked meat.
Plate one meal and pack the other two to enjoy later. Here are few pointers on packing and reheating your meals:
- Pack all the ingredients for each meal together in as few containers as possible. This makes them grab-and-go.
- Use tin foil or parchment paper to separate items you plan to reheat from those you don’t.
- Put wet ingredients on the bottom and dry ingredients on the top. For instance tomatoes, cucumbers, and your dressing could all be on the bottom of your container while your leafy greens rest on top.
- When you are reheating, remember you are just bringing the items up to a temperature you enjoy. You are not cooking the ingredients again. They should be properly cooked already.
- You can use any device to reheat your food: oven, stove top, microwave, or car dashboard. (Meats should not be left at room temperature 40-140F (4-60C) for more than four hours.)
So, how did it all go? Post a photo and tell us about it! You will get better and faster every time you make multiple meals at once. Practice, practice, practice. Your taste buds will thank you for it.
Ready for more? Dive into the rest of the lessons in this series:
- The 5 Moves to Cooking Everything: Home Cooking Boot Camp Lesson 1
- Knife Skills and Stir Fry: Home Cooking Boot Camp Lesson 2
- The 3 Essential Cooking Methods: Home Cooking Boot Camp Lesson 3
- How to Organize Your Kitchen for Speed: Home Cooking Boot Camp Lesson 5
- The Power of Flavor Profiles: Home Cooking Boot Camp Lesson 6
- The Secret Tool of Taste Balancing: Home Cooking Boot Camp Lesson 7
- Learn to Play the 3 Flavor Notes: Home Cooking Boot Camp Lesson 8


If you interested in making healthy, delicious, home-cooked meals in a practical and consistent way, Casey is offering a free five-day email course called Jumpstart Your Healthy No-Recipe Meal Prep Practice.