 Reading Time: 7 minutes
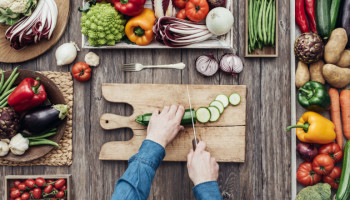
When it comes to home cooking, most of us grab what we need as we need it: counter space, tools, or seasoning. In the process, we turn our kitchen into a hot mess. Even an experienced home cook will often leave a trail of wreckage as he or she puts on even a small dinner party.
This mess can make it hard to motivate yourself to cook, which sends you down the slippery slope of grabbing what’s convenient and neglecting proper nutrition. All that clean-up also means your cooking process takes more time, and none of us have any of that to spare.
We are going to fix all that right now.
Whether you are making one meal or fifteen meals, you can bring radical efficiency (and sanity) to the process by learning how to organize your kitchen. We’re taking a cue from the restaurant world here. How do they turn out a hundred plates an hour with ten people working in a space only two or three times larger than your home kitchen?
They have stations. And that’s what you’re going to create for yourself.
Organize Your Kitchen: 5 Stations for 5 Moves
Each of The 5 Moves needs its own station. (Click here for a refresher on the Moves.) The better equipped and organized each station is, the faster and more effortless your meal prep becomes.
In this lesson, you will create stations for each of The 5 Moves. Then you will repeat the multiple-meal-making drill from lesson four — and see if you can complete it faster and with less effort than your first go-round.
1. How to Create Your Shop Station
Open the average person’s refrigerator and you’ll see mayhem. If there is a method to the madness, it’s hard to discern. Open my refrigerator, and you’ll see produce grouped together (usually still in the bags), the seasonings grouped together (usually on the door), and the meats grouped together.
Here’s how to transform you refrigerator into an efficient machine:
- Take everything out.
- Once the fridge is completely clear, clean it and toss anything crusty.
- Put everything back, grouping produce together, seasonings together, and meats/meat substitutes together.
- Anything that doesn’t fall into one of those three categories is suspect. Take a look at the list of ingredients and confirm that returning it to the refrigerator — instead of tossing it in the garbage — is something you actually want to do.
2. How to Create Your Chop Station
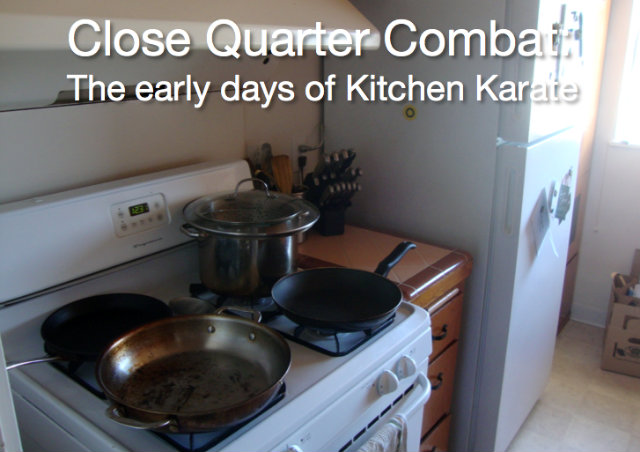
In the restaurant world, the chop station is the prep cook’s domain. You will find the prep cook’s station near the sink next to a big open trash can on rollers. Often the prep cook’s station is re-purposed later in the day when the chefs come in and start cooking. Yours will do this double duty, too.
The chop station is comprised of two areas:
- Chopping area
- Ingredient staging area
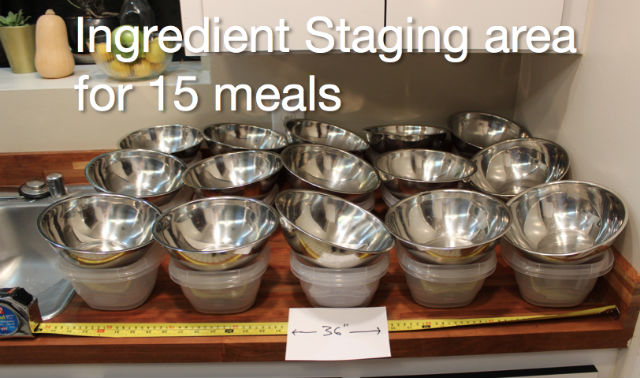
Find the piece of counter space nearest to the sink that allows you to have your cutting board, a stack of bowls, and your compost container out at the same time. You also want to have your garbage bin out with the lid off right next to you.

In addition to your chop area, you also need an ingredient staging area. The area is where you put the bowls with the chopped-up ingredients. You don’t want them piling up in your chop station — you want them piling up in your staging area. Your staging area should be a pivot away from the chopping area, if possible. Depending on how small your kitchen is, your staging area might need to be your dining room table, coffee table, or bed, if that’s what it takes!
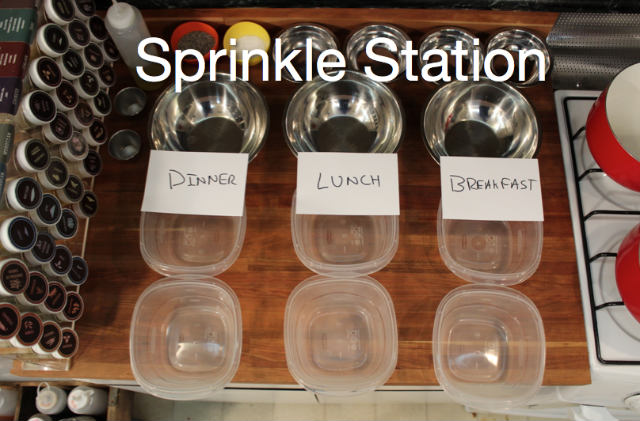
3. How to Create Your Sprinkle Station
The French cooking term “mise en place” translates to “put in place” and refers to the restaurant practice of keeping all of your ingredients within arms reach. Anthony Bourdain, in his book Kitchen Confidential, says that the sous-chefs he worked with in American restaurants shortened it to “meez.” As in “nobody better touch my meez!”
Your “meez” is your sprinkle station, and it will likely be your favorite station of the bunch because it’s where the magic happens.
The sprinkle station consists of two areas.
- Sprinkle area
- Ingredient staging area
In the best-case scenario, you will break down your chop station and set up your sprinkle station in the same place. Either way, whenever you are cooking, always clean up your chop station before you set up your sprinkle station. Your ingredient staging area is just carried over from the chop station.
For your sprinkle area, designate enough counter space to surround all the ingredients for three meals (that’s nine bowls) with all your seasonings.
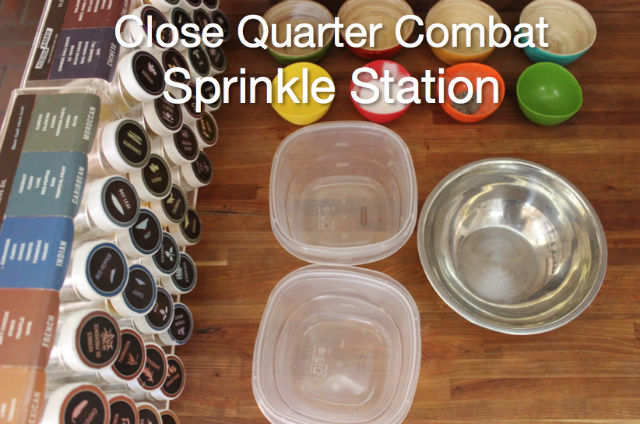
If you don’t have enough space for three meals worth of bowls and your seasonings, then you need to engage in what we at Kitchen Karate call “close quarters combat” or CQC. For CQC, you need to create enough space for just one meal (three bowls) surrounded by seasoning. You will cycle through one meal at time by shuttling bowls between your ingredient staging area and your sprinkle station area.
4. How the Poke Station Works
Time to put on your short-order cook’s hat. (I know you’ve got one hiding in the closet.)
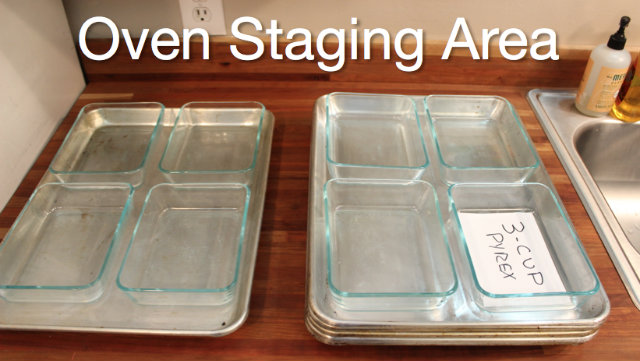
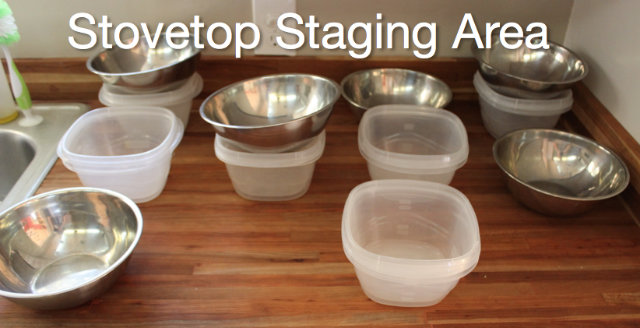
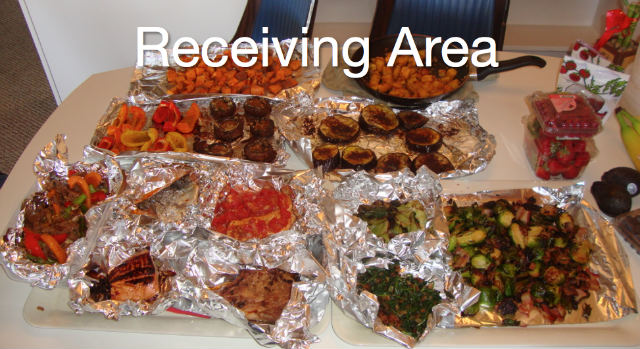
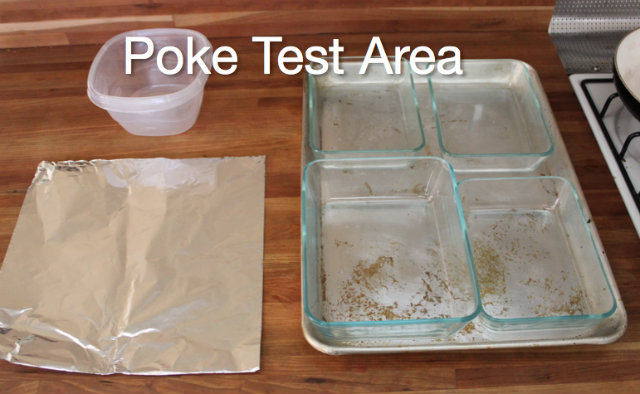
The poke station consists of four staging areas:
- Oven staging area
- Stove-top staging area
- Receiving area
- Poke test area
The poke station typically takes up all of your available counter space and maybe a dining room table beyond that. This is why it’s so important that your chop and sprinkle stations have been broken down and put away. To that point, I should mention the ABCs of cooking: always be cleaning. Your counters and your sink should be clear and clean as you begin your poke move.
So, we’ll start with the oven staging area, where you will put everything that needs to get cooked in the oven.
Whatever remains becomes your stove-top staging area. Basically, your ingredient staging area is now your stove-top staging area.
The receiving area is where you put cooked items before serving. They can go directly onto a plate, directly into storage containers, or can stay on their trays and cool until you are ready to pack or plate.
The poke test area is the space around the stove where you check if things are done throughout the cooking process.
5. What to Do at Your Plate Station
This is the best staging area of all — the dining room table where you eat!
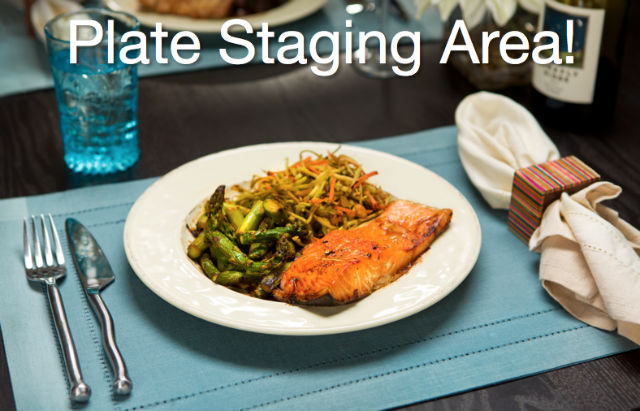
As you develop a weekly meal-prep routine, you will find that your refrigerator becomes part of the staging area for your plate move. We will get into more detailed packing and storing strategies in a later lesson, but for now, try packing the different parts of your meals into as few containers as possible. Labeling them with a simple sticky note makes them even more grab-and-go.
Skill Drill: Organize Your Kitchen and Go!
For this drill, do a dry run of The 5 Moves to create your stations and map out your workflow. Then repeat the drill from lesson four and create three meals at once. Let us know how it goes!
Ready for more? Dive into the rest of the lessons in this series:
- The 5 Moves to Cooking Everything: Home Cooking Boot Camp Lesson 1
- Knife Skills and Stir Fry: Home Cooking Boot Camp Lesson 2
- The 3 Essential Cooking Methods: Home Cooking Boot Camp Lesson 3
- How to Make Multiple Meals at Once: Home Cooking Boot Camp Lesson 4
- The Power of Flavor Profiles: Home Cooking Boot Camp Lesson 6
- The Secret Tool of Taste Balancing: Home Cooking Boot Camp Lesson 7
- Learn to Play the 3 Flavor Notes: Home Cooking Boot Camp Lesson 8


If you interested in making healthy, delicious, home-cooked meals in a practical and consistent way, Casey is offering a free five-day email course called Jumpstart Your Healthy No-Recipe Meal Prep Practice.