 Reading Time: 4 minutes
The reverse sear technique is a little different than the standard “get the pan rippin’ hot and sear for a couple of minutes in each side” approach. That does work, but the reverse sear method gives you a lot more control over how you cook your steak.
Because of the low cooking temp, you have a much more forgiving window with regards to hitting the final temperature you want. You won’t go zipping past medium rare before you know what hit you. And, unlike with most steak-cooking techniques, you can use the fifty minutes of cooking time to easily prepare the rest of your meal.
Some might say reverse sear technique takes patience, but I say it just take a reorganization of how you think. With the reverse sear technique, you can get home from work, set up the steak, and then clean up, take a shower, and relax.
How to Shop for the Perfect Steak
When I’m cooking steaks for more than just myself, I prefer to get a thicker single steak, usually 1.5-1.75”, rather than two or more thinner steaks. Cooking a thicker steak gives you more control over the final product’s degree of doneness. It’s also a heck of a lot more fun to look at.
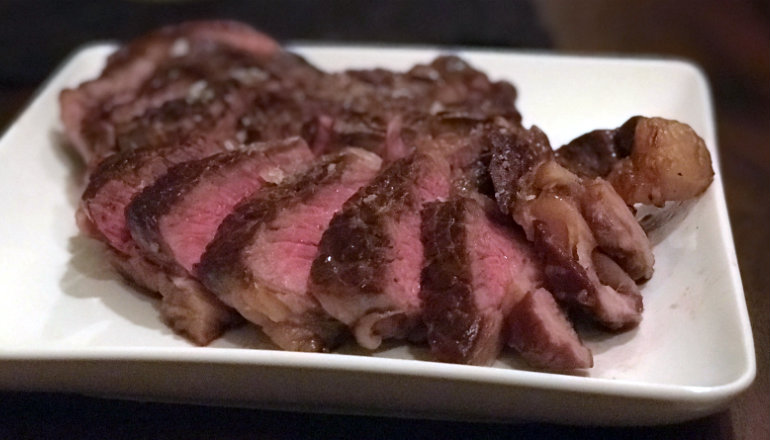
Even if you are feeding others, rather than giving everyone their own thin (possibly overcooked) steak, you can simply slice each steak when you’re done, like you’re slicing a roast. (It’s also a little more elegant than having someone hack a steak to pieces on their plate.)
The Reverse Sear Tools
You’ll want a meat thermometer to help you execute the perfect reverse sear. Your starting and mid-cooking temperatures matter for this technique. Any store-bought thermometer will do, but if you’re really into this, get a probe thermometer. You can leave it in while the meat cooks and have a constant readout on the outside of the oven. You can also simply wing it based on times, but that’s for real cowboys.
Cooking on a rack also helps heat to evenly circulate around the meat and allows the surface to dry out — one of the key components to the reverse sear. Because the surface is dry, you don’t have to deal with the “steaming” phase of searing from raw when all the moisture has to evaporate before browning can begin. I use a small round rack that I set in the pan. When it comes out of the oven, the pan is almost hot enough to finish searing already.
The Perfect Reverse Sear Rib-Eye
The reverse sear method gives you a lot more control over how you cook your steak. And, unlike with most steak-cooking techniques, you can use the fifty minutes of cooking time to easily prepare the rest of your meal.
Ingredients
- 1 rib-eye steak 1.5-1.75” thick
- Kosher salt
- Butter
Instructions
-
Preheat oven to 210 degrees Fahrenheit.
-
If your steak is coming out of the fridge, it's probably around 45 degrees to start. Take its temp with a meat thermometer. From there, your steak will take about 50 minutes to an hour to raise 60 degrees, to 105-110. That’s your target for rare to medium rare (don’t worry, your steak will come up another 20 degrees before we're done).
-
Season the heck out of your steak with kosher salt on both sides.
-
Place your steak on a rack on a pan and place it in the oven.
-
After about 50 minutes, check the temp and remove the steak if you've hit your mark of 105-110 degrees. Otherwise give it 5-10 more minutes. (A good rule of thumb is about one minute of cooking time per degree).
-
Heat a pan over medium high heat and melt some butter in there. Yes butter. It'll burn a bit, but you'll love the color you get on the steak.
-
Sear your steak for 5 minutes total, flipping every 15-20 seconds (this should get it to within 5 degrees of target). Constant flipping browns the surface easily without letting the heat penetrate too deeply into the steak, preventing overcooking.
-
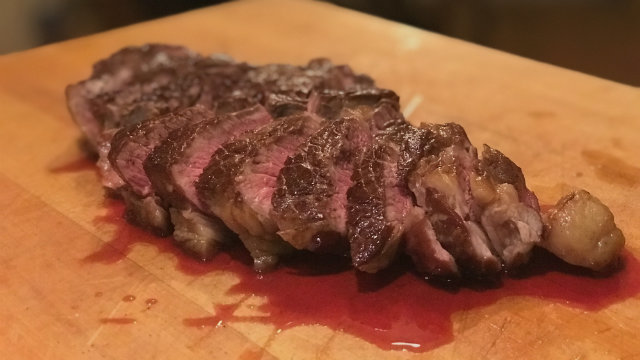
Let sit for 5 to 10 minutes to reach its final temperature of about 135-140 degrees.
-
Slice and serve.


He graduated from UCLA with a BA in philosophy as well as a degree from the Southern California School of Culinary Arts, and feels food is one of the most important parts of a life - it can nourish, heal, and bring people together.
Michael believes health and well-being are as much a state of mind as they are a state of the body, and when it comes to fitness, food, and life in general, he thinks slow is much better than fast (most of the time). Stopping regularly to examine things is the surest way to put down roots and grow.
He knows he will never be done with his own work, and believes the best thing you can do for your well-being starts with loving and working from what you’ve got right now.